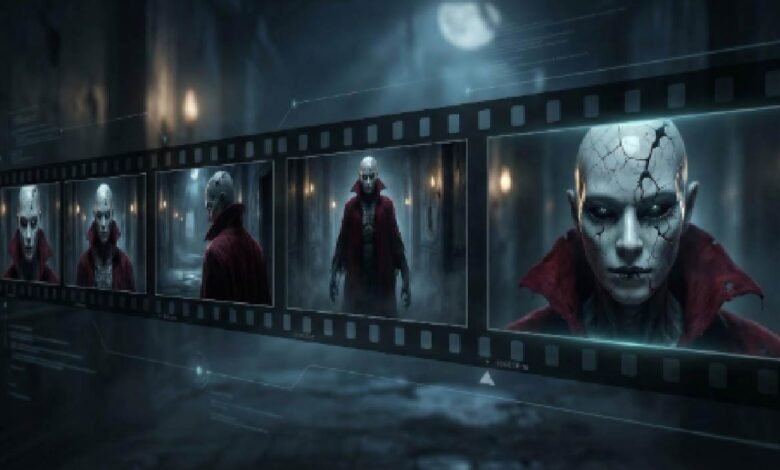
Imagine writing a ten-line prompt, clicking “Generate,” and watching the same snarling demon stride through every shot. That promise is pulling indie horror creators toward a new breed of AI video tools.
Yet early engines betrayed them—Runway’s Gen-2 dazzled in 2023 until “people’s arms and legs meld together and come apart,” according to a TechCrunch report.
Consistency is finally emerging. According to a Google blog post, Google’s Veo now touts “footage that’s consistent and coherent” across shots, and early tests back it up.
Which generators keep your monster intact—and at what cost? We benchmarked the frontrunners on continuity, cinematic polish, audio, clip length, price, and speed.
1. Leonardo.ai (Veo 3): your continuity powerhouse
Open Leonardo’s dashboard and it feels like stepping onto a studio backlot.
Type a prompt, upload a single reference frame, and Veo 3 turns that still into a living scene at 1080p, up to sixty seconds long, with the creature’s scars and eye-glint holding steady from first shadow to final scream.
Consistency is only the opening act. Veo 3 understands camera directions, so you can request a slow dolly or a sudden whip-pan and watch the AI respect your blocking. Add an audio cue such as “distant metallic clang,” and Leonardo stitches sound to motion automatically, sparing you a trip to a separate effects library.
That workflow just improved: Veo 3.1 now rolls in synchronized audio and optional end-frame locks so your scene closes exactly where you intend. For a full feature breakdown and pricing tiers, learn more.
Leonardo Veo 3 AI Horror Video Generator Dashboard Screenshot
Quality control costs credits, not sanity. A free account supplies enough runs to storyboard an entire short; a $10 per month plan raises the bitrate cap and gives priority in the render queue. The service stamps no watermark, claims no usage clawback, and sets no ceiling on commercial distribution.
The real payoff comes when you chain shots. Grab the last frame of Scene A, feed it back as the start frame of Scene B, and the demon’s cracked porcelain mask lines up pixel-perfect. If you want extra insurance, train a lightweight LoRA; the platform walks you through that workflow in minutes.
There are limits. Veo’s safety filters reject graphic gore, and render times climb once you move past the 30-second mark. For narrative horror that leans on atmosphere over splatter, though, Leonardo currently offers the most reliable path from concept to coherent cut.
2. Runway Gen-2 (plus a Gen-3 preview): quick, polished, but watch the seams
Runway brought text-to-video to creators before most filmmakers knew it existed. Its Gen-2 model still turns a prompt into a cinematic four-second clip in under a minute. Type “moonlit corridor, handheld camera, flickering light bulb” and you will see footage that feels lifted from a studio thriller.
Working with live footage? Runway’s older Gen-1 mode shines here. Drop in a real take of an actor creeping down a hallway, and the AI repaints the frames, turning ordinary props into cursed relics while preserving every step and shoulder turn. Many YouTubers use that hybrid method to slip AI monsters into practical shots without tipping off the audience.
Gen-2’s short-clip ceiling is the catch. You must stitch scenes on the timeline, and a jawline or costume detail can drift between shots. Gen-3 aims to solve this with frame-locking and motion-brush tools now in private alpha, but today you still need workarounds. The fastest fix is to export the last frame of Clip A, feed it back as the reference for Clip B, and keep color and silhouette aligned.
Runway Gen-2 AI Video Timeline and Clip Stitching Interface
Pricing sits in the middle ground: a free tier for tests, then a Standard plan at about $15 per month that unlocks higher resolutions and removes export caps. No watermark appears on paid exports, which helps if you sell shorts or pitch to festivals. Budget extra time for sound, because Runway renders silent video; you will add stingers, creaks, and shrieks in post.
Think of Runway as an agile VFX teammate. It turns ideas into test footage faster than any competitor, and its output improves the moment you pair AI clips with real imagery. Nail your continuity tricks and the seams fade from view.
3. The DIY Stable Diffusion pipeline: total control for the fearless tinkerer
Every horror filmmaker dreams of a monster no one else can claim. If you have a decent GPU—think an RTX 4090 with 24 GB VRAM—or access to a rental rig at about $1.20 per GPU-hour on RunPod, a home-brewed Stable Diffusion setup gives you full ownership of look, motion, and even the taboo gore that cloud tools refuse.
The workflow starts with training. Feed 10–20 concept sketches into DreamBooth or a LoRA notebook and the model learns your creature’s bone structure, wardrobe, and unnerving asymmetries. From then on, any prompt that calls Ghoul-Model-v1 renders the same fiend without slip-ups.
Next comes movement. Deforum or AnimateDiff convert keyframes into hundreds of in-between images while optical-flow scripts smooth flicker. You will adjust noise strength, frame overlap, and seed locking, but the payoff is rock-solid consistency across clips far longer than the four-to-eight-second limits of most cloud apps.
Audio arrives later. Moderation filters are absent unless you add them. The trade-off is time: expect roughly one hour of render for each polished minute and be ready to fix Python errors at 2 a.m. Hardware costs are upfront, and rented GPU time can still beat a $40 monthly subscription once projects exceed about 35 GPU-hours.
If granular control matters more than instant output, roll up your sleeves. The monster will follow every direction because you wrote the code that breathes life into it.
4. Kaiber: stylized nightmares that move to the beat
Kaiber feels less like a camera and more like a hallucination generator.
Its main draw is style control. Choose the Anime Horror or Dark Fantasy preset, feed a single illustration of your creature, and Kaiber turns brushstrokes into living skin while soaking the frame in deep reds and bruise purples.
Kaiber Anime Horror and Dark Fantasy Style Presets Interface
Length is the welcome surprise. While most cloud tools stop at ten seconds, Kaiber’s music-video roots let a paid plan create 30-second sequences that sync to any audio you upload. Drop a slow, throbbing heartbeat under the scene and the camera pulses in time, giving your short an intentional rhythm editors usually build by hand.
Consistency lands in the middle tier. Use the same reference image and preset every time and the monster’s silhouette stays recognizable, but Kaiber may vary details such as fabric texture, vein pattern, or tooth count. For title cards or dream montages that flexibility works. For close-ups you might lock frame ranges or splice shots back-to-back so viewers focus on mood, not minutiae.
Costs start low: a five-day trial costs $5 and removes the watermark; the Creator plan begins at $29 per month. Render speed is brisk; a 15-second 1080p clip often finishes before your coffee cools.
Reach for Kaiber when atmosphere matters more than realism. It shines in prologues, music promos, or the fever dream your protagonist bolts awake from. Paired with a literal generator for main action shots, it adds a painterly dread no other platform matches.
5. Pika Labs: the free, fast loop machine for viral inserts
Pika feels like a sketchpad that moves.
Type a moody prompt such as “1970s CRT static, shadowy figure blinking in and out of frame” and five seconds later you have a three-second loop ready for a cursed-tape TikTok. The service is still 100 percent free to use, though clips carry a small watermark on the public beta.
Loops are the entire appeal. Pika’s engine renders smooth start-to-end frames, so your shot replays forever without a hitch. Drop that loop behind on-screen text or splice it between longer scenes and you add instant tension without inflating runtime.
Character continuity inside one loop is solid; stretch across multiple loops and you need a trick. Save the best frame of Loop 1, upload it as the reference for Loop 2, and Pika keeps colors, posture, and most facial geometry intact. Output is capped at square or vertical 720p, but that resolution matches TikTok and Shorts perfectly.
What Pika lacks in length it replaces with atmosphere. The model leans uncanny by default—slightly off physics, grainy textures, dream-logic camera drift—so half the horror tone arrives pre-baked. Add a faint VHS overlay and viewers will swear you spent hours in After Effects.
Use Pika as seasoning, not the steak. It excels at atmospheric cutaways, animated backgrounds, or quick stingers that push your main narrative over the top. Because it is free, you can test ideas at zero budget before investing in longer, higher-fidelity renders elsewhere.
6. Synthesia & HeyGen: talking-head terror with perfect face continuity
Sometimes the scariest moment is not a jump-cut creature. It is a calm figure staring straight into the lens, delivering dreadful news with an unblinking smile. That is where avatar generators shine.
Open Synthesia and you see a roster of photo-real presenters. Type your script, pick a voice, and in about 30 seconds a newsroom-sharp anchor warns viewers about the haunted object in your plot. The avatar stays on-model, never flubs a line, and, because you can reuse it in every scene, anchors continuity better than any CGI monster.
Need extra creep factor? HeyGen lets you train a custom avatar from a short video of yourself in makeup. Record 3 minutes of footage, upload, and you have a digital double that can read fresh dialogue on demand. Place that self-avatar on a green-screen background of static or security-cam grain and you get instant found-footage authenticity.
There are guardrails: avatars remain mostly waist-up and gestures stay subtle. If you want them to scream or flail, composite extra layers in post. Pricing starts around $30 per month, which covers about 10 minutes of finished video—costly for long films, but painless for exposition snippets or multilingual dubs.
The workflow sweet spot is narrative glue. Open your short with an AI anchor delivering a chilling broadcast, cut to AI-generated action, then return to the same anchor for the final twist. Viewers trust the face because it never changes, and that steadiness makes every on-screen anomaly around it feel even stranger.
7. Revid.ai: speed-run horror for social-first campaigns
Revid suits marketers who need a spooky promo live by lunch.
Select the Horror Short template, type a one-sentence brief such as “possessed plush toy stalks a child’s bedroom”, and Revid exports a 15-second vertical cut complete with text overlays, jump-scare sound effects, and a license-free music bed.
Templates lock pace and aspect ratio, so footage lands on TikTok or Shorts without extra editing. Character continuity depends on prompt repetition. Because the engine blends stock and generative clips, altering your wording can morph the plush’s button eyes between shots. Reuse the same phrase to keep continuity acceptable for bite-size content.
Pricing sits at the high end: $40 per month for the entry plan, but that fee includes unlimited exports and full commercial rights. Agencies juggling seasonal campaigns across many client channels often recoup the cost. Indie filmmakers may pause at the subscription, yet most admit Revid’s one-click captions and auto-translated subtitles remove hours from post.
Think of Revid as a rapid-prototyping conveyor belt. It will not shoot your festival feature, yet when you need five creepy teasers before opening night, few tools draft them faster.
How the tools stack up — a quick-scan cheat sheet
| Tool | Monster consistency | Max clip length | Resolution | Built-in audio | Cost efficiency | Ideal use |
| Leonardo (Veo 3) | ★★★★★ with image plus start-frame locks | ≈ 60 s | 1080 p | Yes | High value at $10 / mo | Narrative shorts |
| Runway Gen-2 / 3 | ★★★☆☆ with reference-frame workaround | 4–10 s | 720 p–1080 p | No | Moderate | VFX overlays |
| DIY Stable Diffusion | ★★★★★ (custom model) | Unlimited | user set | No | Hardware cost only | Full-control projects |
| Kaiber | ★★★★☆ via repeat start image | ≤ 30 s | 1080 p | Music sync | Low–mid | Title sequences |
| Pika Labs | ★★☆☆☆ per loop | 3–4 s loop | 720 p | No | Free | Viral inserts |
| Synthesia / HeyGen | ★★★★★ avatar-based | Minutes | 1080 p | Yes (TTS) | $30 + / mo | Exposition cuts |
| Revid.ai | ★★☆☆☆ prompt-dependent | 15–30 s | 1080 p | Yes (templates) | $39 / mo | Social promos |
Key takeaways
- Continuity leaders: Leonardo, a tuned Stable Diffusion setup, and avatar tools keep characters intact across scenes.
- Length still costs: Only Veo and open-source pipelines sail past 30 s without chaining multiple clips.
- Free versus friction: Pika is unmatched for zero-budget mood clips, but you trade length and resolution.
- Audio is rare: Veo and avatar generators save a sound-design step; others ship silent, so plan for foley.
Pro tips to lock your monster in place
Our team has tested, broken, and rebuilt these tools for months. Follow three habits to keep characters glued together even when the models misbehave:
- Re-use a “hero” frame. Export the final still of each scene and feed it back as the start frame for the next. Most generators treat that reference as law, anchoring colors, scars, and proportions.
- Clone your prompts. Skip poetic variations. If your first scene calls the creature a “gaunt, porcelain-masked demon in a tattered red cloak,” paste that exact phrase into every follow-up shot. Even a small adjective change can trigger drift.
- Batch-generate, then curate. Long shoots fail more often than short bursts. Produce five short takes, pick the keeper, and use its last frame to seed the next batch. Momentum builds, and continuity holds.
Conclusion
Horror filmmaking with AI hinges on one question: can the tool keep your creature looking the same from scene one to scene five? Clip-length limits and character drift are the bottlenecks that separate a tense short film from a visual mess. Start with image-to-video workflows that lock a reference frame, test consistency across at least three scenes, and only then commit render credits to a full project.