Not long ago, Himalayan salt walls were mostly seen in high-end spas and wellness environments. Today, they are increasingly being incorporated into residential interiors due to their aesthetic appeal, calming visual effect, and the use of specialized salt wall adhesive for reliable installation.
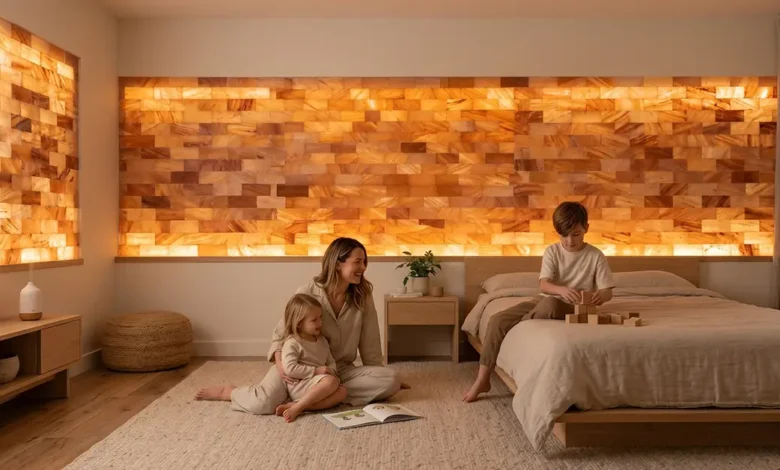
The soft, diffused lighting and natural texture create a more relaxed indoor atmosphere compared to conventional decorative materials. As a result, homeowners are now installing salt walls into bedrooms, meditation areas, and even home saunas.
However, achieving a durable and visually consistent installation requires more planning than it may initially appear.
Why Are Himalayan Salt Walls Gaining Popularity?
A portion of it is certainly visual. Salt bricks are backlit, producing a softer atmosphere compared to regular lighting. Instead of a harsh white tone, the room takes on a warmer glow that is easier on the eyes, particularly in the evenings. When combined with proper installation methods and a suitable salt wall adhesive, the overall effect remains both visually appealing and structurally reliable.
Beyond aesthetics, there is a growing shift toward natural interior materials such as wood, stone, and mineral-based elements. Himalayan salt walls align with this trend by introducing organic texture and subtle ambient lighting without overwhelming the overall design of a space.
Things like:
- Wood textures
- Stone surfaces
- Warm lighting
- Himalayan salt accents
all work together naturally.
A salt wall usually doesn’t overpower the room. It changes the feeling quietly instead.
Can You Actually Build One Yourself?
Yes, in many cases you can.
Smaller salt walls are much more manageable than they initially look. A decorative panel or compact feature wall is completely realistic for homeowners willing to take their time with the installation.
But there’s something important people often underestimate.
Building a wall that looks good for one week is easy. Building one that still feels stable years later is different.
That’s why preparation matters so much.
A solid home salt wall usually depends on:
- Proper framing
- Good lighting placement
- Stable airflow
- Reliable salt wall adhesive
- Careful brick alignment
Skipping these basics may not create problems immediately, but eventually they start showing up.
What Materials Do You Need?
Before installation starts, it helps to organize everything first instead of improvising halfway through.
Most residential salt wall projects use:
| Material | Purpose |
| Himalayan salt bricks
|
Main visible wall surface |
| Salt wall adhesive
|
Holds bricks securely together |
| Structural frame
|
Supports wall weight |
| LED lighting
|
Creates a soft backlit glow |
| Power supply
|
Supports lighting setup |
And honestly, adhesive quality matters more than most beginners expect.
People often spend heavily on premium salt bricks and then buy the cheapest bonding material available. That usually becomes a problem later.
Why Is Specialized Salt Wall Adhesive Important?
Himalayan salt can absorb and release moisture depending on the environment. Because of this, bonding salt bricks is different from working with materials like concrete or ceramic.
In real installations, regular glue often does not hold well when humidity or temperature keeps changing. Over time, this can cause small movements between the bricks, which may affect both the strength of the wall and its alignment especially when lighting is installed behind it.
A specialized salt wall adhesive is designed to handle these conditions. It provides stronger bonding, reduces movement between bricks, and helps the wall stay stable for a longer time.
Step 1: Choose the Right Location
This part matters more than people think initially.
Salt walls work best in areas where the atmosphere already feels calmer:
- Bedrooms
- Meditation spaces
- Wellness rooms
- Reading corners
- Home saunas
Try avoiding places with constant direct water exposure though.
Humidity itself usually isn’t the biggest problem. Repeated moisture contact is.
You’ll also want reasonable access to electricity if you’re planning to add backlighting later.
Step 2: Build a Strong Support Frame
Salt bricks are heavier than they appear.
That’s why structural framing matters so much during installation.
Most projects use:
- Metal framing
- Wood framing
- Reinforced backing panels
The frame should support most of the wall’s weight instead of forcing the adhesive to handle everything alone.
A strong frame combined with quality salt wall glue creates much better long-term stability.
Step 3: Prepare the Surface Properly
The installation surface should be:
- Dry
- Clean
- Stable
- Free from dust
This is an easy step, but rushing to prepare can lead to bigger issues later than we expect.
Since salt promotes moisture absorption, the adhesive layer on wet surfaces loosens over time.
Investing more time here is often fruitful in saving frustration in the future.
Step 4: Plan the Lighting Carefully
Lighting changes everything with salt walls.
Without backlighting, the wall mostly functions as texture. Once lighting is added behind it, the entire atmosphere changes.
Most installations now use warm LED systems because they:
- Produce less heat
- Use less electricity
- Create smoother glow effects
The goal isn’t extreme brightness.
It’s a softer ambient light that feels relaxing instead of harsh.
Step 5: Apply Salt Wall Adhesive with Precision
Adhesive application plays a critical role in the long-term stability of the installation. The bonding layer should be applied in thin, consistent amounts between each brick to ensure even pressure distribution.
Excess adhesive can create uneven spacing, while insufficient application may weaken structural support. In professional installations, careful and gradual application is preferred to maintain alignment and reduce internal stress between bricks.
A properly applied salt wall adhesive system helps minimize shifting, maintains uniform spacing, and preserves the overall visual consistency of the wall over time.
Step 6: Place the Bricks Carefully
Now comes the part people usually enjoy most.
Place each brick gradually while keeping spacing and alignment reasonably consistent. Press gently so the adhesive spreads evenly behind the surface.
Trying to rush this step usually affects the final appearance immediately once the lighting turns on.
Step 7: Let the Wall Cure Fully
Many DIY builders get impatient here.
The wall needs time to settle properly before heat exposure, lighting use, or additional movement.
Most salt wall adhesive systems require roughly twenty-four hours minimum curing time, although longer drying periods are often better depending on room conditions.
Avoid adjusting bricks repeatedly during this stage.
Small movements weaken bonding before the adhesive fully stabilizes.
Common Mistakes People Make
Some installation mistakes show up repeatedly in DIY projects.
| Mistakes | Why It Causes Problems |
| Using ordinary glue | Weakens under humidity changes |
| Applying excess adhesive
|
Creates uneven pressure |
| Poor ventilation | Traps moisture behind the wall |
| Weak framing | Reduces long-term stability |
Most major issues actually begin as small shortcuts early during installation.
How Long Can a Salt Wall Last?
A properly installed salt wall can easily last well over 10 years.
Sometimes longer.
The lifespan usually depends on:
- Adhesive quality
- Humidity levels
- Air circulation
- Structural framing
- Heat exposure
- Installation precision
Interestingly, the salt bricks themselves are rarely the main issue.
Maintaining a Himalayan Salt Wall
Most walls do not need constant upkeep.
A few habits help significantly:
- Maintain stable airflow
- Avoid direct water exposure
- Clean gently using dry cloths
- Inspect small gaps occasionally
- Use low-heat lighting systems
Most expensive repairs start as smaller problems that went unnoticed too long.
DIY vs Professional Installation
Smaller decorative salt walls are realistic for many homeowners.
DIY Projects
DIY salt wall installation usually works best when:
- The wall is relatively compact
- Strong framing already exists
- Lighting setup remains simple
- Specialized adhesive is used properly
The biggest DIY mistake is usually underestimating how important adhesive selection actually is.
Professional Installation
Professionals generally focus more carefully on:
- Weight distribution
- Lighting balance
- Ventilation planning
- Structural support
And honestly, those details matter much more as the wall becomes larger.
Conclusion
Building a Himalayan salt wall at home is more achievable than many homeowners initially expect. Even smaller installations can significantly enhance the ambiance of a space by introducing softer lighting, natural textures, and a more balanced visual environment.
However, the construction of a wall that is really permanent cannot be achieved by simply piling the bricks one over another.
Its long-term sustainability is due to the planning and application of the frame, the correct airflow, and the selection of the appropriate salt wall adhesive at the initial stage.
FAQs
Is specialized salt wall adhesive really necessary?
Yes. Himalayan salt reacts differently from ordinary materials, so a specialized adhesive provides better long-term stability.
Can regular construction glue work temporarily?
Sometimes temporarily, yes. But it usually doesn’t perform well long-term under humidity or temperature changes.
How long does a home salt wall usually last?
A properly installed wall can often last well over 10 years with stable conditions and proper maintenance.
Does ventilation affect salt wall durability?
Definitely. Good airflow helps reduce trapped moisture behind the wall.
Are backlit salt walls difficult to maintain?
Not really. Most only require basic cleaning and stable environmental conditions to remain in good condition