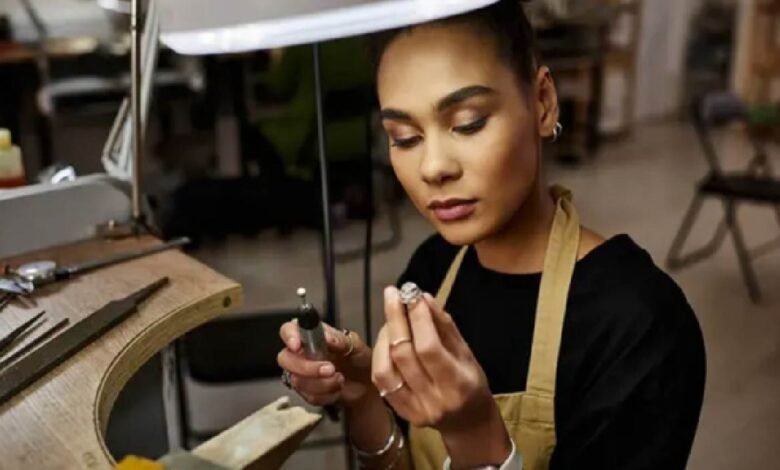
This afternoon, another sigh echoed through the studio. No need to look—it was surely another new intern practicing engraving on the inner band, only to have the tool slip, leaving a glaring, deep scratch on the silver ring’s surface, which had been polished to a mirror-like finish.
That feeling of a hand trembling and a heart skipping a beat—every beginner transitioning from traditional hand-carving to pneumatic engraving has likely experienced it. Many people tend to think of pneumatic engraving as a “cheat code” tool; with the machine’s assistance, they imagine lines will flow as smoothly as silk. But the moment they actually grip the handle and press the foot pedal, they realize it’s nothing like that at all. That sudden jolt of force often leaves beginners unable to even steady the tip of the tool.
Today, let’s skip the long-winded textbook explanations and just chat casually about those frustrating, hard-to-pin-down “stumbling blocks” that drive beginners crazy when they first start using pneumatic engraving for rings.
That “hidden power” you love to hate
The first mistake beginners most often make is struggling with air pressure.
When many people first get their hands on an air-powered engraving machine, they think that higher air pressure means less effort and more power. As soon as they step on the pedal, the piston surges forward with a “thud-thud-thud,” and the blade shoots out. In reality, when carving rings—especially delicate work like setting bezels on stackable rings, micro-carving, or engraving fine lines—what’s required is precise, measured pressure. If the air pressure is too high, the moment the tool tip touches the metal, there’s a strong recoil. The harder you try to clench your fist to hold it steady, the stiffer your wrist becomes. Once your wrist stiffens, the lines lose all their life.
I made the same mistake when I first got my pneumatic equipment. I cranked up the pressure so high that my thumb was throbbing from the vibration, and the engraving came out all pitted and uneven, looking like a dog had chewed on it. It wasn’t until I talked to my mentor that I understood: the essence of pneumatic engraving lies in fine-tuning and frequency. A good machine delivers stable, low-resistance micro-impulses when you gently press the foot pedal. The force flows with your intent, not against it. If the blade tip keeps jumping or won’t penetrate the material, try lowering the air pressure—to the point where you think, “Hmm, this feels a bit slow.” Use the pads of your palms to feel the vibrations coming from the handle, and let the machine guide your hand—don’t force the machine to follow you.
The Angle Myth: What You Think Is a 45-Degree Angle Is Actually “Digging a Foundation”
Another headache is the angle at which the tool is held.
Practicing on flat copper plates and carving on curved rings are two completely different things. Since rings have curves—whether it’s the outer arc or the concave inner surface—the angle of the tool tip must be constantly adjusted as the ring rotates. Many beginners watch videos of master engravers and assume they never change their angle, making the process look incredibly elegant. But that’s because their left hand is moving. The right hand holds the tool, while the left hand controls the engraving ball—the two hands work together in perfect harmony.
Beginners tend to fall into two extremes: holding the angle too high, causing the blade tip to skim the surface and leave only shallow scratches without cutting through. Apply too much force, and the blade slips—ruining the ring. If the angle is too steep, the blade tip plunges straight into the metal; when the air compressor kicks in, the blade head gets stuck like a small shovel, unable to move, and may even snap off.
This feel is very subtle and hard to describe. You have to find the critical point where the blade “bites” into the metal the moment the tip makes contact. Once it’s in, level the handle slightly, stabilize the depth, and push forward. When encountering a change in curvature, the speed at which your left hand rotates the engraving ball must match the speed of your right hand’s push.
Using a high-performance pneumatic tool makes it easier to capture this critical point. Inferior machines deliver jerky, jolt-like impacts, while a good machine’s power is as smooth as flowing water. You can clearly feel it: “Ah, the depth is just right—I can follow the curve now.”
Don’t Confuse a “Dull Blade” with “Lack of Practice”
Sometimes it really isn’t a matter of poor technique.
I’ve seen plenty of beginners who use the same blade from morning till night, continuing to stomp on the pedal even after the tip has worn completely round, all while complaining that the pneumatic engraving machine doesn’t work well.
Although pneumatic engraving machines save effort, they place even higher demands on the shape of the blade’s cutting edge than traditional hand-held engraving tools. When using a hand-held knife, you instinctively adjust your pressure based on how dull the blade is. With a pneumatic engraving machine, however, the high-frequency impact means that if the blade angle is incorrect or the blade is dull, the vibrations will directly translate into destructive force, causing the metal edges to become jagged or even chip.
Beginners often overlook the two polished surfaces on the blade. They focus solely on whether the main cutting edge is sharp enough, forgetting about the support angle beneath the blade’s belly. If the support angle is ground too wide, the blade will get stuck in the groove and fail to cut deeply; if it’s ground too narrow, the tip is prone to breaking.
Material hardness also varies—pure gold, 18K gold, 925 silver, and platinum all require completely different cutting angles and sharpness levels.
Before starting any project, even if you just run the blade through a micro-grinder and polish it with leather, the texture of the resulting lines will be completely different.
When choosing tools, don’t pay those “cheap” tuition fees
Since we’re on the subject, let’s get real. Many beginners are reluctant to invest, thinking, “It’s just a hobby—I’ll just buy a cheap, generic pneumatic tool for a hundred or two to play around with.”
Honestly, this “cost-saving” approach is often the biggest waste of all.
Those cheap, no-name machines have extremely crude air valve mechanisms. When you press the foot pedal, it either doesn’t respond at all or suddenly unleashes a massive burst of force—there’s no such thing as “linear control.” For a craft like ring engraving, which requires millimeter-level precision, this rough power output is nothing short of a disaster. It will quickly destroy your confidence, making you wonder, “Am I even cut out for this?”
The core value of an excellent pneumatic engraver lies in its precise control of every air pulse. When you apply just a touch of pressure, it delivers a gentle vibration as soft as a sewing needle hitting the ground; when you need to remove large areas of metal background, it provides a rich, powerful thrust. This distinct, smooth, and seamless experience can cut a beginner’s learning curve in half.
Final Thoughts
The truth is, there are no shortcuts when it comes to ring engraving.
Every artisan’s path is paved with scraps. Those masters you see on social media effortlessly carving perfect vine patterns and scrollwork—who knows how many “failures” they’ve melted down and stashed away in their drawers?
Even though I’ve pointed out so many common pitfalls today, when you actually pick up the knife yourself, you’ll likely stumble into every single one of them. That’s perfectly normal. The key is to pause and take a look every time you mess up: was the air pressure too high, was the blade tip dull, or was your left hand turning too fast?